For Creators filling a Space with artworks and objects.
Add and arrange content
Build the room, add shapes, text, 3D models, and splats, display videos on surfaces, set up projectors, and organize everything.
Overview
This page follows the order you'll usually build in: the room, the objects you place in it (shapes, text, 3D models, and photoreal splats), your artwork videos and how to display them (on surfaces and with projectors), keeping multi-screen playback in sync, styling surfaces with materials and textures, and staying organized. New to the editor? Start with Using the Studio. Remember to Save with the top-right button as you go.
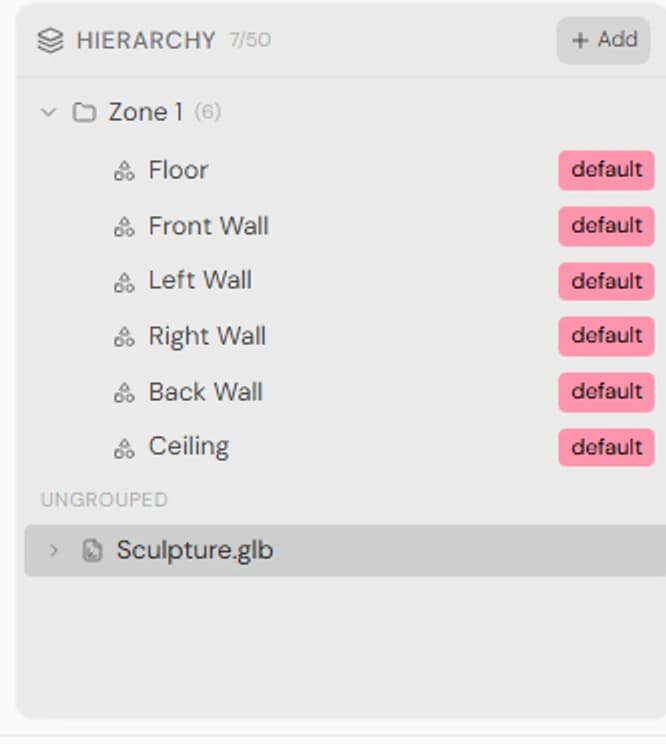
Everything you add appears in the Hierarchy on the right. Select any item there (or in the canvas) to edit its properties.
Build the room with Zones
A Zone is the room or structure of your exhibition — its floor and walls. A Zone is required to publish, so this is usually the first thing you add.
- 1Open the Space panel and choose Add Zone.
- 2Pick a preset that matches the room you want (the eight presets are listed below).
- 3Set the dimensions — the fields shown depend on the preset (explained below).
- 4Optionally keep with a Track checked to create a synced playback Track alongside the Zone.
- 5Select Confirm to place it.
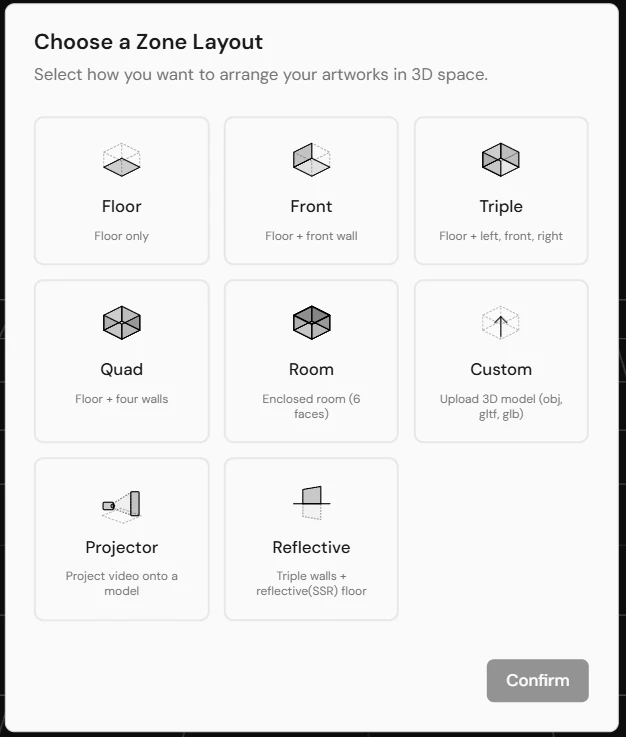
- Floor — floor only.
- Front — floor plus a front wall.
- Triple — floor plus three walls.
- Quad — floor plus four walls.
- Room — a fully enclosed room.
- Reflective — walls with a reflective floor.
- Custom — upload your own room model (GLB, OBJ, or FBX).
- Projector — a ready-made projector showcase to project a video onto a model.
Set the dimensions
After you pick a preset, set its size in the Dimensions section (all values are in meters). Which fields appear depends on the preset:
- Floor — X (width) and Z (depth) only; a floor has no height.
- Front, Triple, Quad, Room, and Reflective — X (width), Y (height), and Z (depth).
- Projector — instead of a room size you set the projection Output Size: W (width) and H (height), in meters. You can fine-tune its position and size later in the Projector panel.
- Custom — no dimensions to set; your uploaded model keeps the size it was authored at.
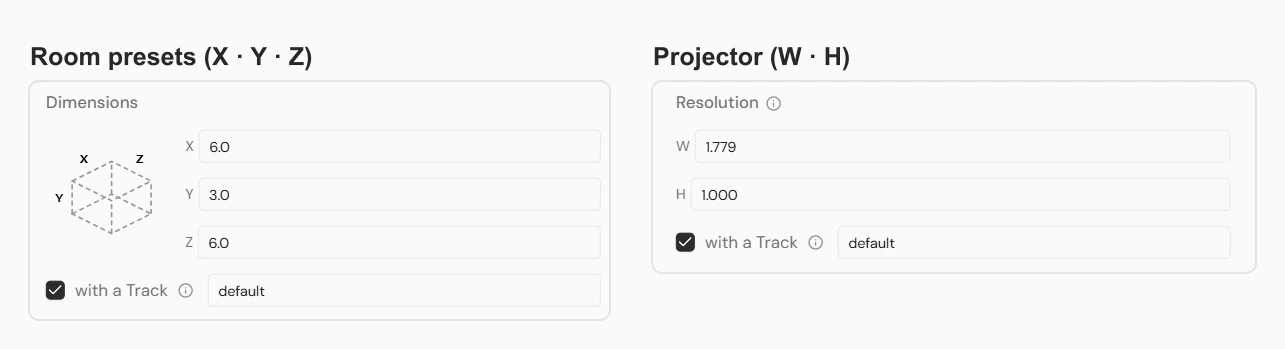
Leave with a Track checked to create a synchronized playback Track (and a matching viewpoint) together with the Zone. This is handy when the Zone's screens should play in sync — see Sync playback with Tracks further down this page.
Add basic shapes
Basic shapes are handy as pedestals, screens, dividers, or accents. Add them from the canvas or Hierarchy, then position them with the gizmo or exact values.
- Plane — a flat panel, great for showing a video artwork.
- Box, Sphere, Cylinder, Torus, and Circle — solid primitives you can resize and style.
Add 3D text
There are two kinds of text, both with many Korean and Latin fonts:
- Text — crisp flat text. Edit the content, size, line height, letter spacing, alignment, and anchor point. Best for labels, titles, and captions.
- Text3D — extruded letters with real depth and an optional bevel, plus full control over color, metalness, and roughness. Best for sculptural, dimensional lettering.
Text objects display words only — they cannot display a video artwork. Use a Plane (or another surface) for video.
Add 3D models
- 1Open the 3D Models panel and upload a model file (GLB, OBJ, or FBX, up to about 200MB).
- 2Once it's ready, choose Add to scene to place it.
- 3Position, rotate, and scale it like any other object.
- 4To fine-tune a single part of the model, select that child part and override its material, texture, assigned artwork, transform, or visibility.
You can have up to about 10 models in a Space. Need to project a video onto a model instead? Use the Projector below.
Add Gaussian splats
Gaussian splats are photoreal captures of real spaces or objects (file types .spz, .ply, .rad). Upload one, place it in the scene, and adjust its opacity and level of detail to balance quality and performance. You can have up to about 5 splats in a Space.
Add and manage artwork videos
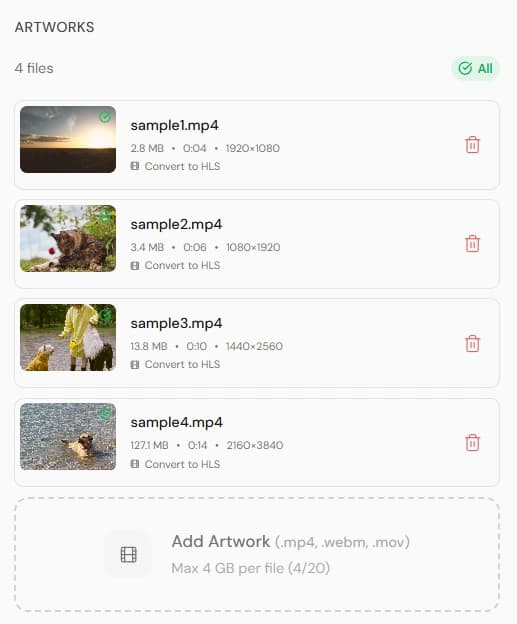
The Artworks tab (left panel) holds every video in your Space. You can add more here at any time — not only during the upload step.
- Drag video files onto the panel, or click to browse (.mp4, .webm, .mov, up to about 4GB each, 20 per Space).
- Each video shows its status — uploading, processing, or ready — along with its size, duration, and resolution. Retry any upload that failed.
- Videos are processed into smooth streaming (HLS). The panel shows that state (queued, encoding, or done); if a video has not been converted yet, use Convert to HLS, or Retry a failed conversion.
- Delete removes a video from the Space and from any surface it was on — this cannot be undone.
Display artwork videos on surfaces
- 1Select a surface or a specific face (for example a Plane or a face of a Box).
- 2In its Artworks section, assign one of your uploaded artwork videos.
- 3Assign the surface to a Track so the video plays automatically for visitors, and set its Volume. The play / pause / restart controls let you preview it right in the editor.
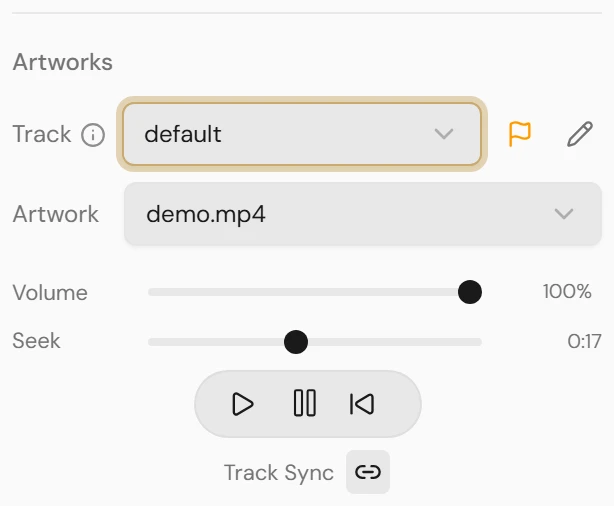
Videos that are still processing after upload won't play until they're ready. Manage your artworks anytime in the Artworks panel.
Use a Projector
A Projector casts a video onto surfaces in your scene — ideal for projection-mapped pieces. Add one from the Hierarchy panel's Add (+) menu, under Projectors, or start from the Projector Zone for a ready-made setup.
- 1Add a Projector and point it by setting its position and direction.
- 2Tune the projection with size, intensity, sharpness (how crisp its edge is), and range.
- 3Choose Edit Mapping and assign a video to the projector's surface.
- 4In the same editor, place the surface inside the projector frame, drag its four corners (perspective / keystone) so it lines up with the wall, and crop the source video.
- 5Need more than one shape on the wall — a rectangle here, a triangle there? Add more surfaces (rectangle, triangle, ellipse), each with its own video, placement and warp.
- 6Using more than one projector on the same wall? Blend the overlap — see Blend overlapping projectors below.
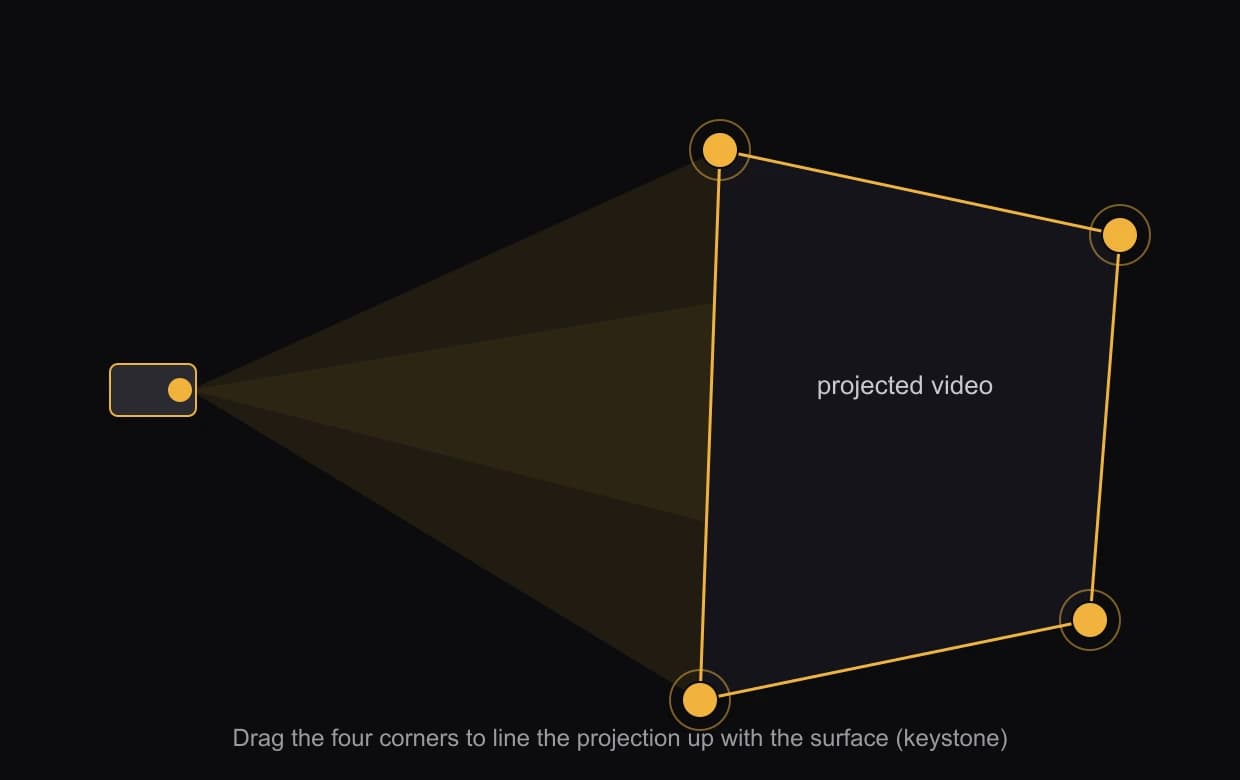
You can have up to 20 projectors in a Space. Past about 10 the Studio warns you: every projector costs a texture slot on the GPU, and on weaker devices going too far can leave the Space blank for some visitors — so add them sparingly and check Preview on a modest machine.
Blend overlapping projectors
Two projectors aimed at the same wall make the overlap twice as bright. Edge Blend fades each projection inward so the two add up to one even image.
- 1Aim the two projectors so their projections overlap — about 15–20% of the width is a good starting point.
- 2Give each projector its half of the video with Edit Mapping → Source · Crop, then line the two up with Projection · Warp. While you do this, set the surface's Test Pattern to Alignment Grid under Media — it projects a test grid instead of that surface's video, cut to its shape, so you can see whether the two overlap exactly. Set it on both projectors: Edit Mapping works on one projector at a time, and the pattern stays on when you leave it.
- 3In Edit Mapping, open the surface's Edge Blend and set the edges that face each other — Right on the left projector, Left on the right one — and widen each fade until it covers the overlap. With light helpers shown, a dashed outline marks where each fade begins, so you can see when it reaches the neighbouring projection — on a single full-frame rectangle shaped with the four corners. If you shaped it with a warp grid, moved it inside the frame, or use more than one surface, the fade follows the image instead, so check it with the surface's Test Pattern set to Alignment Grid.
- 4Use the same Curve on both projectors (each edge has its own), and leave Sharpness at 1.00 while blending.
Line the projections up first, then blend. A fade cannot hide an overlap that is still misaligned.
Sync playback with Tracks
A Track is a synchronized playback group. Every video screen (and projector) assigned to the same Track plays, pauses, and seeks together, so a multi-screen piece always stays aligned. A screen that is not on any Track plays independently of the others — and it will not start on its own for visitors, so put anything that should play in the viewer on a Track. The Studio flags untracked videos while you work and again when you save.
- 1Create a Track — the simplest way is to keep with a Track checked when you add a Zone. You can also manage Tracks directly in the Studio.
- 2Assign screens to it: select a Plane, a Box face, or a projector and choose the Track in its properties.
- 3Everything on that Track now shares one timeline — play, pause, and seek stay in sync for viewers.
Each Track is also linked to a viewpoint (a saved camera position), so a visitor can jump straight to the piece that Track drives. You can have up to about 10 Tracks per Space.
Materials and textures
Select any object to change how its surface looks in the properties panel:
- Set the color, metalness, and roughness, add an optional emissive (glow) color, or switch on unlit mode for a flat, light-independent look.
- Apply a built-in texture preset (Black, Cream, Dark Beige, Grey, or Painted).
- Or upload your own texture maps per channel — diffuse, normal, roughness, and AO (up to about 50MB each).
- Use auto-tiling to repeat a texture across a large surface, and adjust the UV region and flip to control how it maps on.
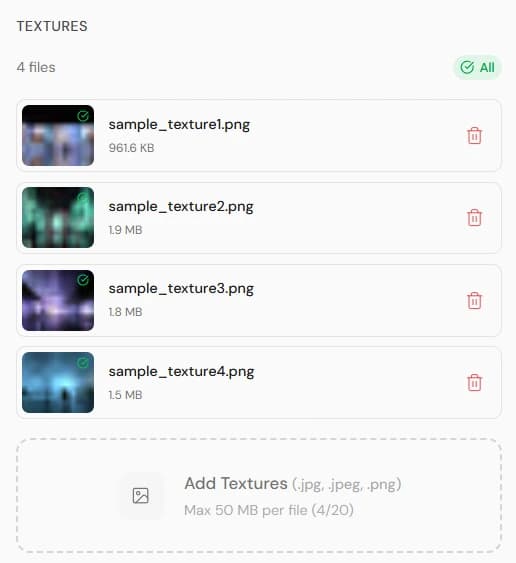
The Textures tab (left panel) is your texture library: upload JPG or PNG images there (up to about 50MB each, ~20 per Space), then apply them to a surface from its material. Delete an unused texture from the same tab.
Organize with groups and the hierarchy
The Hierarchy (the outliner on the right) lists everything in your scene. Select an item to edit it, and use it to duplicate, hide, or delete objects.
- Groups bundle several objects so you can move, rotate, and scale them together. Up to about 10 groups per Space.
- Drag an item onto a group to add it, or drag it to Ungrouped to take it out; if it is on a different Track you'll be asked which Track to keep.
- Double-click an item (or press F) to focus the camera on it.
- Items on a Track show a Track pill, with a star marking the Track's primary member.
- Hiding an object keeps it in the scene but out of view. This is saved with the Space, so a hidden object stays hidden for visitors too — a hidden video stops playing, and visitors can walk through it. Use it to park something, not just to tidy the Studio.